Showing posts with label celtic knot work. Show all posts

Namárië


I finished this calligraphy piece several months ago but forgot to blog it-- it's J.R.R. Tolkien's beautiful poem Namárië from The Lord of the Rings. It is written in Quenya (the High Elvish language). On the left, the poem is written in our alphabet, and on the write, it is written in the Tengwar (Elvish) script.

The poem is a beautiful piece which the Lady Galadriel sings to Frodo when the Fellowship leaves Lothlorien to destroy the Ring. 

I didn't have space to fit the entire poem on my little sheet of paper board, so I just used the first stanza and stuck the final two lines (about farewells and finding Valinor) on at the end. 


The border was done entirely freehand using india ink and watercolors. I am pretty proud of it-- this was my first time making an Art Nouveau border, and I'm getting better at making celtic knots with decorative tips.

The heraldic device at the top is the symbol for Feanor, as designed by Tolkien himself. I thought this device would be fitting because not only is Feanor Galadriel's anscestor (if I have my genealogy straight), but it was mostly because of his family that the Elves were banished from Valinor-- and this poem is all about Galadriel's longing for Valinor when she thought she could not return, but nonetheless wished that Frodo may make it there one day. (Valinor is sort of like an Elvish heaven-- sort of, not really, but it's the best description I can come up with off the top of my head).


Here's the English version of the poem:
Ah! like gold fall the leaves in the wind,
long years numberless as the wings of trees!
The years have passed like swift draughts
of the sweet mead in lofty halls beyond the West,
beneath the blue vaults of Varda
wherein the stars tremble in the song of her voice, holy and queenly.

Who now shall refill the cup for me?

For now the Kindler, Varda, the Queen of the Stars,
from Mount Everwhite has uplifted her hands like clouds,
and all paths are drowned deep in shadow;
and out of a grey country darkness lies on the foaming waves between us,
and mist covers the jewels of Calacirya for ever.
Now lost, lost to those from the East is Valimar!
Farewell! Maybe thou shalt find Valimar.
Maybe even thou shalt find it. Farewell!

______________
For those of you complete Tolkienites, the title of this blog post ("Farewell") is not about me saying farewell to blogging or anything. I have one more crazy busy week of school left, and after that I will be taking a couple of days to just do nothing and not feel guilty about it (in other words, I will curl up on the hammock for two days and do nothing but devour some novels and drink lots of iced tea and catch up on TV shows before bed). After that, however, I will be working on some of the hundreds of creative projects that have been clanking around in my brain. :) 

It's so incredibly strange to think that I am almost done with high school. It's been a beautiful four years and I've learned and grown so much! For all of you still in school, when does your summer vacation begin?

Celtic Knotwork, Not a Tutorial


As I've gotten better and better at drawing Celtic knotwork, several people have asked me to make a tutorial. 

The truth of the matter is that I still don't know enough to feel qualified to teach someone how to draw knotwork. Much of what I know is just a gut instinct that comes from drawing frequently and paying close attention to the designs I see other artists creating. (Our library doesn't have any helpful books and I've had a hard time finding good comprehensive tutorials online). I've been able to teach some of these techniques to friends, but only with the ability to see where and why I can't explain things well enough for it to make sense the first twenty tries!

Hence the reason why this video is not a tutorial. I just doodled a bunch of Celtic knotwork in basic squares using different grids and set-ups (filling in irregular shapes is a HEADACHE even if it looks pretty!). If you've attempted drawing knots before and understand the very basic ideas, then this will be super helpful. If not... well, you probably won't learn much but you get to watch me draw. Lucky you, right?

Sir Gawain and the Green Knight manuscript.
From Wikipedia.
What do Celtic knots have to do with Tolkien? This month's posts are, after all, supposed to be Tolkien-themed. So I'm going to grasp at some straws here to tie this just-because video back to Tolkien. :)

Tolkien was a scholar of linguistics, particularly languages from the early days of England. He translated many texts (one of my favorites is Sir Gawain and the Green Knight) and would of course have seen some illuminated manuscripts.

Interlacing (the technical name for knotwork) is a very common design in illuminated manuscripts. Many people have heard of the Book of Kells, a book of the Gospels heavily decorated with knotwork. This is one of the most important books in the history of modern knotwork, since most of the designs we commonly see are actually copies of the knots drawn by monks in ninth-century Iona.
The Book of Kells contains a massive amount of intricate decoration, and no two designs are exactly alike. And it was all drawn completely by hand.

   
(images via wikipedia)
Norse wood carving with interlacing.
Not sure if it's authentic, but this is the idea
image via


Somewhere in the past twelve hundred years, the techniques for drawing knotwork-- the techniques used by Vikings on their ships, monks in their books, and sculptors on the famous Irish crosses-- were lost. For a long time people were only able to copy ancient designs. Many people in the past couple hundred years developed ways of designing new knots, but most designs you see these days outside of certain artsits' work is very similar to the knots in illuminated manuscripts. (I'd cite a reference for that only I don't feel like finding the file for my old research paper).


Tolkien also loved Norse mythology; in fact, he created Lord of the Rings as a way to fill a void in English literature. England had no mythology or legends of its own, unless you count a few tales like Beowulf and later stories of King Arthur (many of which were written in France!). Norse mythology and literature is very present in Tolkien's world, particularly in the civilizations of Rohan and Gondor.

(For instance, only last week I learned that King Theoden's famous lines "Where is the horse and the rider? Where is the horn that was blowing? Where helm and the hauberk, and the bright hair flowing?" is a sort of rip-off of the Old English poem The Wanderer.)

In a letter, Tolkien explained his idea...
"Do not laugh! But once upon a time (my crest has long since fallen) I had a mind to make a body of more or less connected legend, ranging from the large and cosmogonic to the level of romantic fairy-story--the larger founded on the lesser in contact with the earth, the lesser drawing splendour from the vast backcloths--which I could dedicate simply: to England; to my country. It should assess the tone and quality that I desired, somewhat cool and clear, be redolent of our 'air' (the clime and soil of the North West, meaning Britain and the hither parts of Europe; not Italy or the Aegean, still less the East), and, while possessing (if I could achieve it) the fair elusive beauty which some call Celtic (though it is rarely found in genuine ancient Celtic things), it should be 'high', purged of the gross, and fit for the more adult mind of a land long steeped in poetry. I would draw some of the great tales in fullness, and leave many only placed in the scheme, and sketched. The cycles should be linked to a majestic whole, and yet leave scope for other minds and hands, wielding paint and music and drama. Absurd." - J.R.R. Tolkien
I don't think he was so absurd. Of course no single man could do that-- legends take generations and hundreds of nameless taleweavers-- but Tolkien's efforts have had an indelible mark on fantasy stories.

So that's how I'm relating Celtic knotwork to Tolkien.

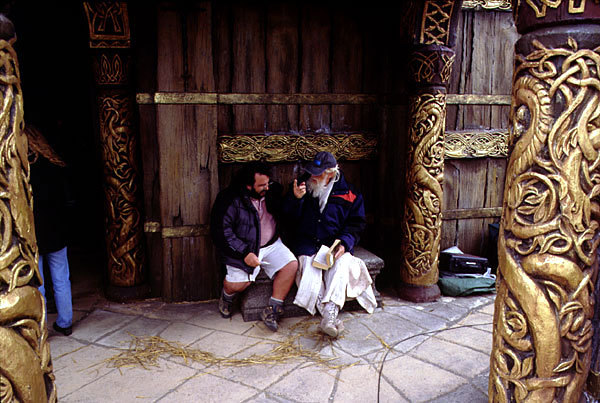
Plus the talented designers who worked on the LotR filmes obviously used knotwork in the beautiful sets and little details everywhere.

image via
image via
image via

image via
Peter Jackson and Ian McKellan at the Edoras set
image via

Crayon Batik {Tutorial}

Originally published at Confessions of a Seamstress as a guest post.

Today I'm going to teach you how to dye fabric using crayons! You can make something like this:


It all began with Ukrainian eggs! A couple of months ago, I was excitedly talking to my art teacher about pysanky, in which eggshells are decorated with bright dyes using a wax-resist technique. This made her remember a project that she did in art school: batik.

Those of you who frequent fabric stores might recognize that word. The really pretty, brilliantly colored fabrics with intricate designs at around $15 a yard? Yup. Those are imitation batik fabrics. Traditional batik is even more expensive because of the ardourous handmade process. A swath of fabric is dyed in a light color, and then beeswax designs are drawn onto the fabric by hand to "lock in" the light color. The fabric is then dipped in a darker color and waxed again, and the process is repeated many times before the dye is allowed to set and the beeswax is removed.

Just as I made Sharpie Easter eggs because I didn't have the tools for pysanky, we figured out how to "cheat" at batik using crayons! (It's not an original idea-- I had seen it done once before on a blog called Suzy's Artsy-Craftsy Sitcom).

This is definitely a do-and-learn project. If you attempt it and have any tips for me, please share!

DIY Crayon Batik
Supplies
Crayons (the perfect way to use up that old box of broken crayons-- my family had two shoeboxes full, but we only used half a box in art class, shared between six or seven batik projects)
Muffin pan (mini muffin pan recommended for lots of colors/mixing)
Heating tray or oven
White cotton fabric
Cold water dye (hot water will melt the wax) and gloves
Cheapie paintbrushes
Iron
Newspaper

Now, the whole idea is that you paint the crayon wax onto the material, crumple it, spray the black dye into the cracks in the wax, and iron the wax off the material. The dye from the crayon will remain, all pretty and bespeckled with the black dye.

And as a bonus, you get these weird flat crayon discs.

I've all sorts of pictures to help you along. :)

Start by peeling the crayons and putting them in a muffin pan. Melt them on a heating tray (or in the oven-- beware that they will cool quickly in that case). Then prepare your design on the cotton with a pencil.


(At this point I'm going to point out that my Celtic knot is not a real knot because I made several mistakes in the over-under pattern!)

front
back
Use cheap paintbrushes to paint the melted crayon onto the cotton (the paintbrushes will be ruined). Once the wax is on, there is no getting it off-- so be careful! Start with the main design first.


Make sure that the crayon has completely permeated the material. I set the cotton on the heating tray between each color to make sure that the dyes really "set."

This is important! We ruined our first attempts because crayon cools quickly and cool wax just sits on top of the fabric. The color didn't set.

(Melt the most important colors first so they don't bleed together badly).

Front
Back-- notice how very little of the yellow actually permeated the material?
Continue this process until the entire piece is covered with crayon.

This was my first project, a pseudo "Dan-Cheong" based off a Korean style of architectural painting.
 I did not heat the material between colors. Instead, I melted everything all at once and made the colors run together.
Be sure to melt the wax between each color and pay attention because you don't want the colors to run together.


Both of these pictures show crayon batiks by the younger kids. You can see a few of them whose colors ran together. As always, click to enlarge.

Then wrinkle it up!

Every time you wrinkle the fabric, it creates cracks for the black dye to seep into. Don't wrinkle too much or else your final piece will be almost completely black. (Yes, another thing learned the hard way.)

This is my teacher's first project; she crinkled the fabric too much and dipped the material in the dye, rather than spraying the dye. You can barely see the hot air balloons.

Spray the dye onto the material and let it set as per label instructions.

We based this project off of Suzy's and took her advice about cold water dye. You certainly do not want hot water melting your crayon artwork into a big blob!


Next, place the material between layers of newspaper and heat the iron to the highest setting.

Iron the wax out of the cotton.

This is a tedious process. DON'T keep ironing after the wax is showing through the newspaper or you will do what I did and re-melt the wax back into the material, creating a big mess and making colors run. Change the newspaper several times a minute.

Yes, you'll go through a lot of newspaper.

Iron until the fabric loses its stiffness. Rub the material with a paper towel. If no color rubs off, you are good to go.


I haven't tried putting this through the wash. I figure that as long as no color rubs off, it isn't going to stain anything!


Do whatever you want with your handmade art fabric! I turned mine into a decorative pillow, proving that I cannot sew a straight line (it's horribly loppy!). Now my Celtic-knot obsession gets to live on my bed! It even matches my curtains. :)


Enjoy!